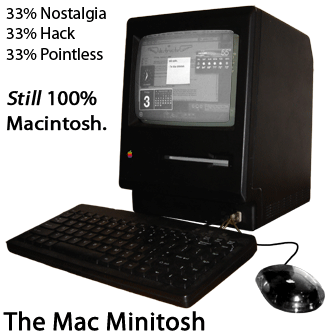
HOWTO Install OSX on your Macintosh
 Please click here to digg this story, so I will be inspired to do more cool hacks like this. Thanks. eltoozero (at) gmail (dot) com, Thanks for reading!
This project has been completed Since September 2005.
Specifications
As you can see from the following chart, this is a serious upgrade for such a classic workhorse.
| Macintosh Plus | Mac Minitosh | |
|---|---|---|
| CPU | 8 MHz 68000 | 1.25 GHz G4 |
| RAM | 1 MB | 256 MB |
| Hard Drive | N/A | 40 GB |
| Optical Drive | N/A | Combo Drive |
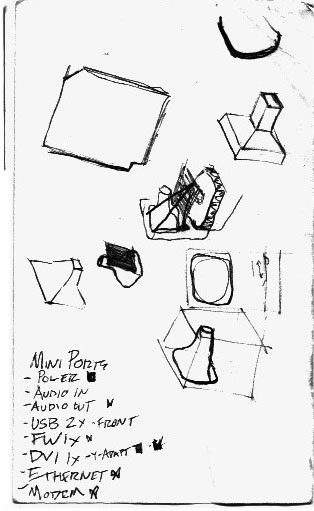
Ports:
Tools:
Steps:
WARNING: Working in, around, or even near an exposed CRT tube can cause serious physical harm and will kill you if you aren't careful, this is not a joke.
if you don't understand the seriousness of this statement, do not attempt any step of this project. For additional information, google "CRT Discharge".
This project consists of 4 primary steps, none of which will be covered in full detail. This is a project for Makers, you are expected to work some of this out for yourself. The images provided should be of great assistance to you in your quest.
- Gut your victim Macintosh
- Gut your CRT monitor
- Mount your hardware
- Close it up
Our machine gave up its ghost long ago, so we didn't lose any good meat gutting the proud beast. This is a nostalgia peice , we're only gaining out of this sacrifice. Every effort was made to recycle classic electronics where possible.

After gutting the machine, the parts were test-fit, any suprisingly much of the work has already been done for us by forward thinking Apple engineers! The DVD drive of the Mac-mini sits perfectly against the floppy drive. The drive bezel will be extended to accomodate DVDs.
I suspect this is the case because the Macintosh internals appears to be suited for either 3.5" drives, or 5.25", even though the front bezel only has a floppy slot. Rather than for upgrades, there was likely a question weather the hardware would support 5.25" floppys (the standard of the time), or the new Sony 3.5" floppy disk format.
The monitor electronics need a little work, and some parts are moved hacked for better placement. Use your best judgment, and remember you wont be able to use force to close the case in this mod.

The CRT was a bolt in mod, there were no changes needed to the monitor to get it to mount to the macintosh chassis. A bracked had to be built to hold the monitor electronics, a plexi shield was attached to the bottom to prevent shorting. Aluminum stock was used for the bracket, a mock-up was created from cardboard based on crude measurements made by holding the cardboard up to the mounting holes.
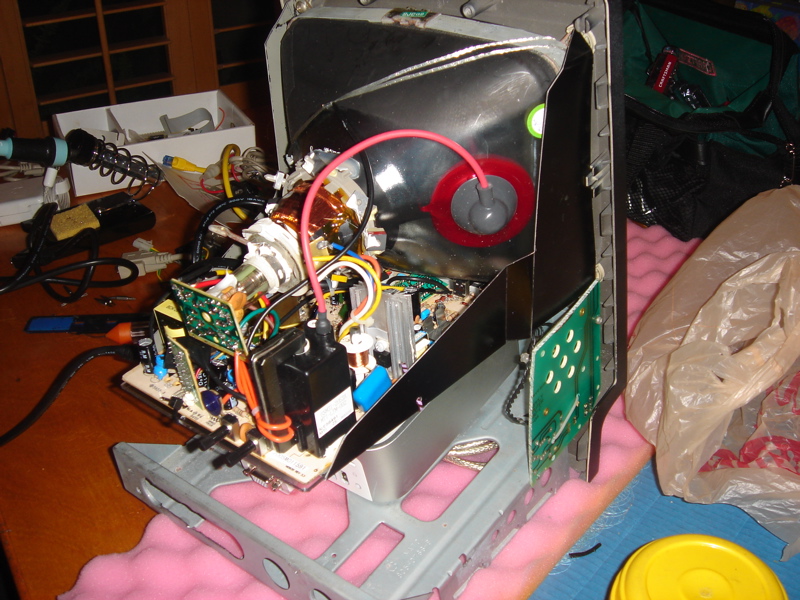
Not shown here, the v-pos and h-size pots on the back of the monitor were cut in half with an x-acto saw to reduce the strain on the outside of the case.
The eject "strength" of the DVD was checked to ensure needed ejecting and insertion clearance.
![]()
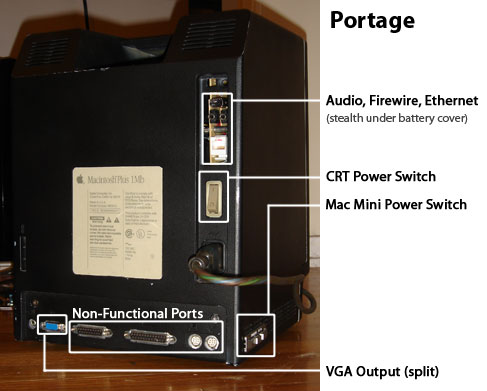
As you can see, the entire back panel was recycled, including the original power buttons. This was done to keep the authentic look. The serial port has been replaced with a standard VGA. This will be "split" from the internal B&W vga monitor.
Also of note, independant power for mac mini and CRT. I activate the CRT with the switch on the back, I activate the mac mini using the interrupt switch on the side of the machine.
A new power switch is wired onto the mac mini hardware and led out the vent. I found the correct "plug" for the minimobo on half of a vaio laptop I bought at the TRW swap meet.

The motherboard is cut, as well as the other circuit boards, and what is left is used for mounting the brightness pot. (which was initially intended to work), and the internal speaker (maybe someday).
Cables are tucked in, nice and snug.

And there you have it. In this picture you can barely see the happy mac, courtosey of Imagine BootX. Download an original Happy Mac boot logo re-drawn from screenshots right here.
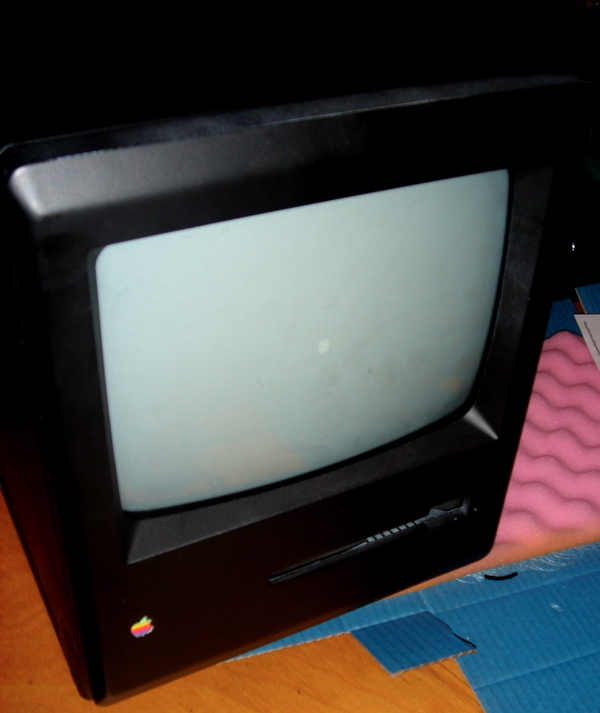
A much better pic

Obligatory Screenshot
Have no doubts that this is very usable, crisp, and pleasant to use, just like the original.

Orignal Notes